
General News
The Complete Guide to Traditional Lime Plaster
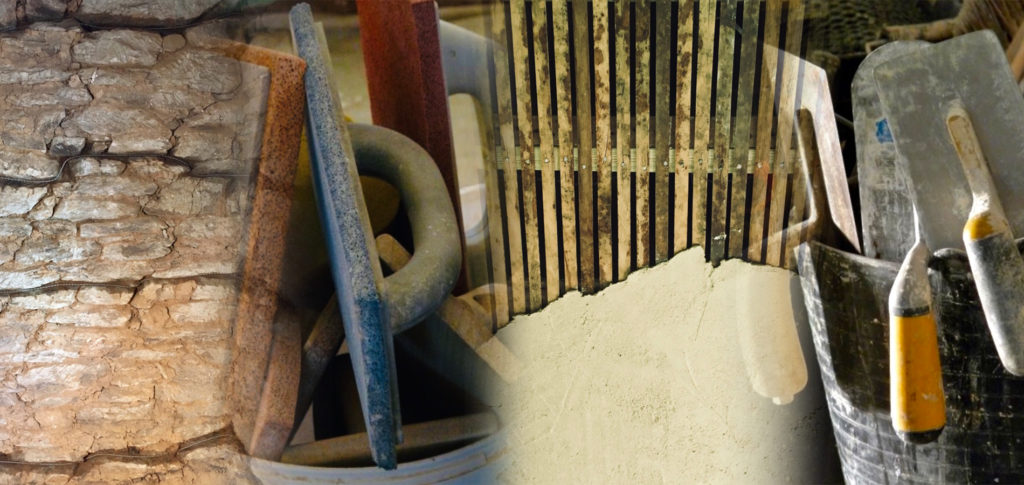
Sep
The Complete Guide to Traditional Lime Plaster
Lime plaster has been used to finish and protect buildings for centuries and remains one of the most appropriate plastering materials for the repair and conservation of many traditional buildings today.
Unlike modern gypsum and cement based plasters and renders, traditional lime plaster is vapour permeable, relatively flexible and works sympathetically with solid masonry construction. It can be applied to stone and brick masonry, timber laths and a range of suitable modern breathable backgrounds.
This guide explains what traditional lime plaster is, where it can be used and the principles behind preparing, applying, curing and finishing a traditional 3 coat lime plaster system.
What Is Lime Plaster?
At its simplest, traditional lime plaster is made from lime, aggregate and water.
In a traditional lime putty plaster, the binder is a mature, non-hydraulic lime putty produced by burning and slaking limestone. This is mixed with carefully selected sands and, depending on the coat and intended use, may also contain animal hair or other fibres.
Unlike gypsum plaster, which sets relatively quickly through a chemical reaction, non-hydraulic lime putty plaster hardens gradually through a process known as carbonation.
During carbonation, the lime reacts with carbon dioxide in the air and gradually converts back to calcium carbonate. This circular process is known as The lime Cycle.
This slower process is also one of the characteristics that gives traditional lime plaster its distinctive working properties.
Why Use Lime Plaster in Traditional Buildings?
Many older buildings were constructed very differently from modern buildings.
Traditional solid stone and brick walls were commonly built using lime mortars and finished with lime renders and plasters. These materials allow moisture to be absorbed and subsequently released as environmental conditions change.
This ability to manage moisture is often described as breathability.
Lime plaster is vapour permeable, allowing water vapour to pass through the plaster rather than creating an impermeable layer over the wall.
This is particularly important in traditional solid-wall buildings, where the introduction of harder or less permeable modern materials can alter the way moisture behaves within the building fabric.
Lime plaster also has a degree of flexibility, making it well suited to the small amounts of movement often found in older masonry and timber structures.
What Is Lime Putty?
Lime putty is traditionally produced by adding water to quicklime in a process known as slaking.
The resulting lime is stored as a wet putty and allowed to mature before use, traditionally for a period of several months.
Mature lime putty can then be mixed with carefully graded aggregates to produce mortars, renders and plasters.
Because lime putty remains workable while protected from the air, lime putty plasters can be supplied ready mixed rather than as a dry powder requiring the addition of water on site.
Lime Putty Plaster vs Hydraulic Lime
Not all lime plasters are the same.
Traditional non-hydraulic lime putty plaster primarily hardens through carbonation and generally remains highly vapour permeable and relatively flexible.
Natural Hydraulic limes contain reactive components or impurities that allow them to develop an initial set through reaction with water. They are commonly classified as NHL 2, NHL 3.5 and NHL 5 according to their strength characteristics.
Neither material is automatically “better” than the other.
The appropriate lime depends upon the building, background, exposure, required performance and nature of the work.
For internal traditional plastering and lath-and-plaster work, lime putty plasters have a long history of successful use.
The Traditional Three-Coat Lime Plaster System
Traditional lime plaster is commonly built up in a series of coats rather than applied as one thick layer.
A typical three-coat system consists of:
Base Coat → Float Coat → Top Coat
Each coat performs a different job.
- Base Coat
The Base Coat is the first and coarsest plaster coat.
Its purpose is to establish the initial plaster build-up, bond with the prepared background and provide a strong mechanical key for the subsequent coats that follow.
On uneven traditional masonry, the base coat begins the process of bringing an irregular background up to the required finished surface.
It contains a larger aggregate and usually animal hair or other fibres, helping to control shrinkage and allowing deeper areas to be dubbed out as the wall is brought towards the required plane.
On masonry, the majority of the levelling and straightening – often around 90%, is achieved with the base coat, although this may require more than one application.
When plastering onto traditional timber laths, the hair or fibres become a crucial component as the base coat is pushed through the gaps between the laths to form nibs behind, which mechanically hold the plaster in place. The process of plastering on laths is slightly different to that of masonry.
The surface of the base coat is scratched or keyed before the following coat is applied.
[View Base Coat Lime Plaster →]
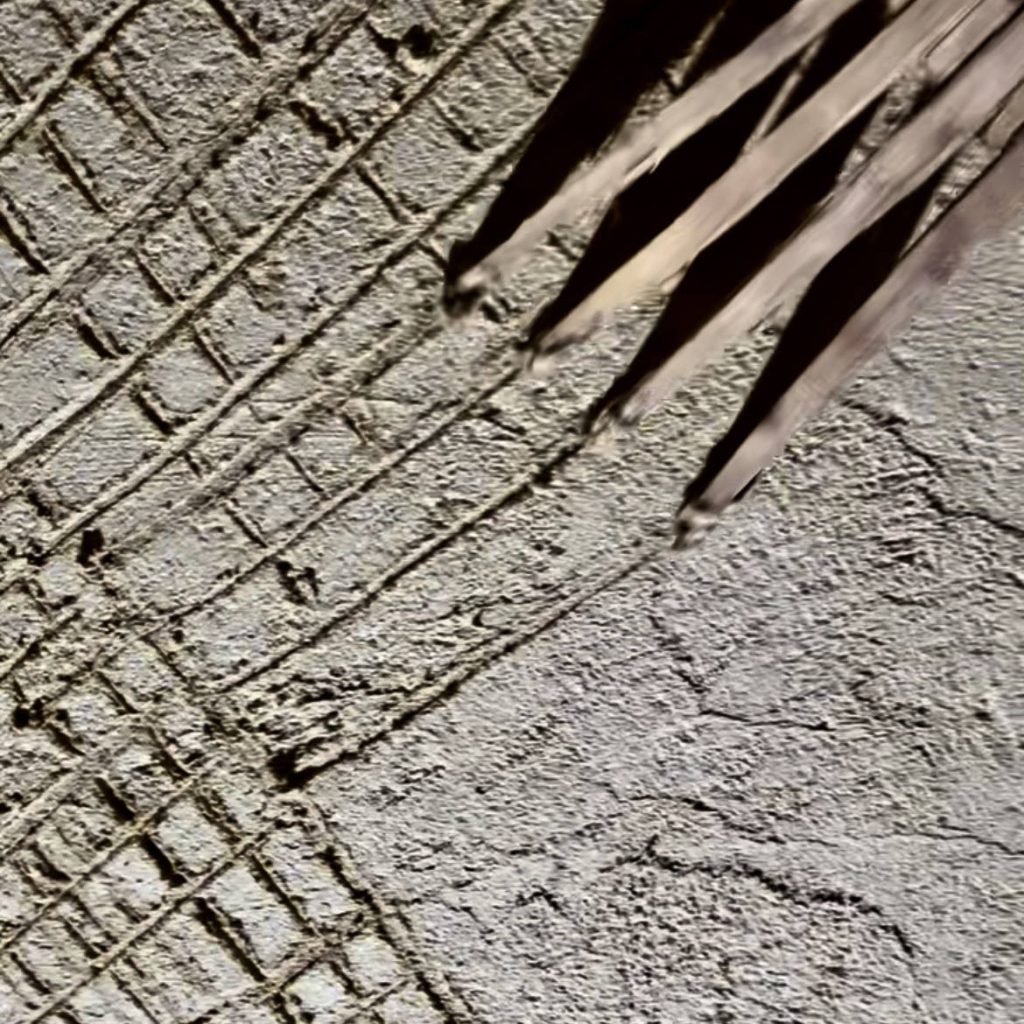
2. Float Coat
The Float Coat is the second coat in the system. It is used to straighten and level the surface, either providing the background for the final Top Coat on internal plasterwork or being float-finished as the final surface on some external renders.
It typically contains a finer aggregate than the Base Coat and is therefore more susceptible to shrinkage if applied too heavily. For this reason, it is generally best kept to approximately 8–10 mm, with dubbing out and the majority of straightening carried out in the preceding, coarser Base Coat.
The plaster is then worked using rules, straightedges and floats as appropriate to produce either the surface required ready for the final finishing coat or as a finish in itself for external render.
[View Float Coat Lime Plaster →]
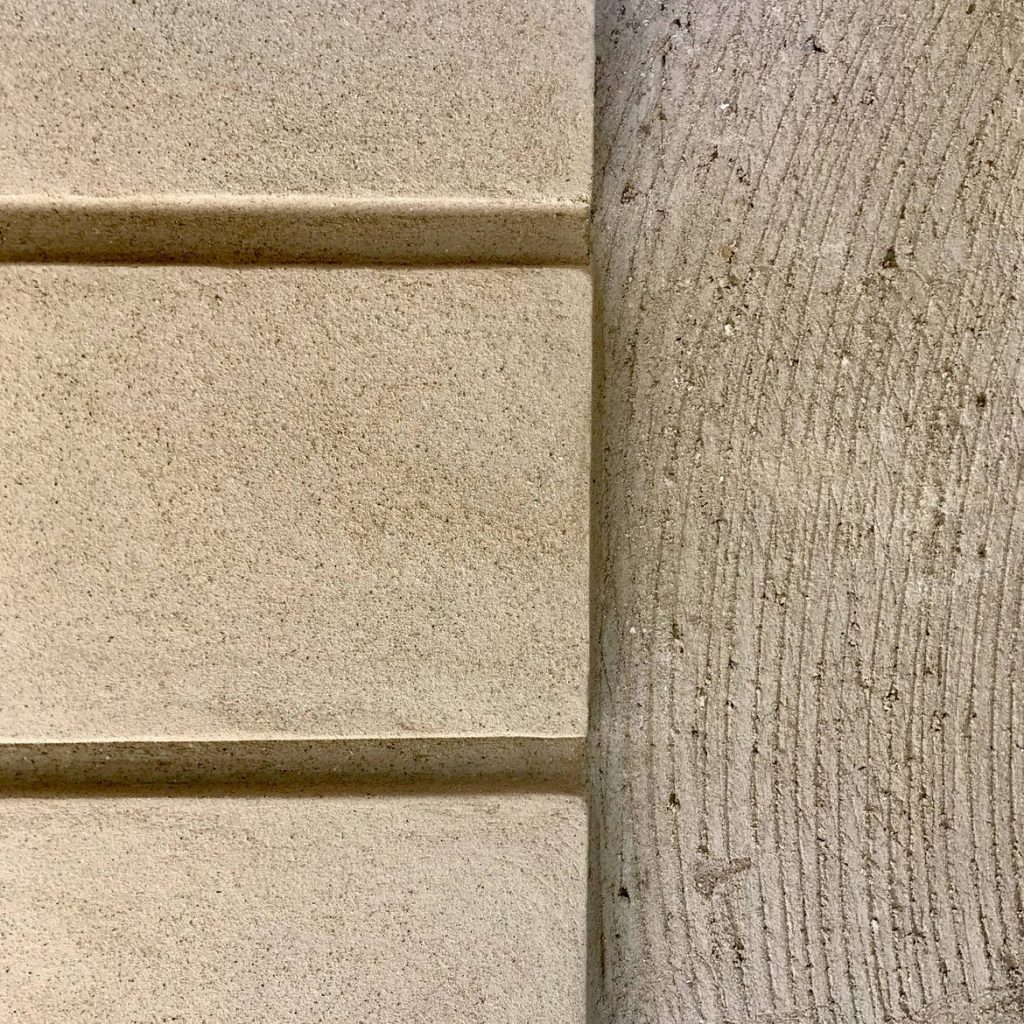
3. Top Coat
The Top Coat is the finest coat in the system and produces the finished plaster surface.
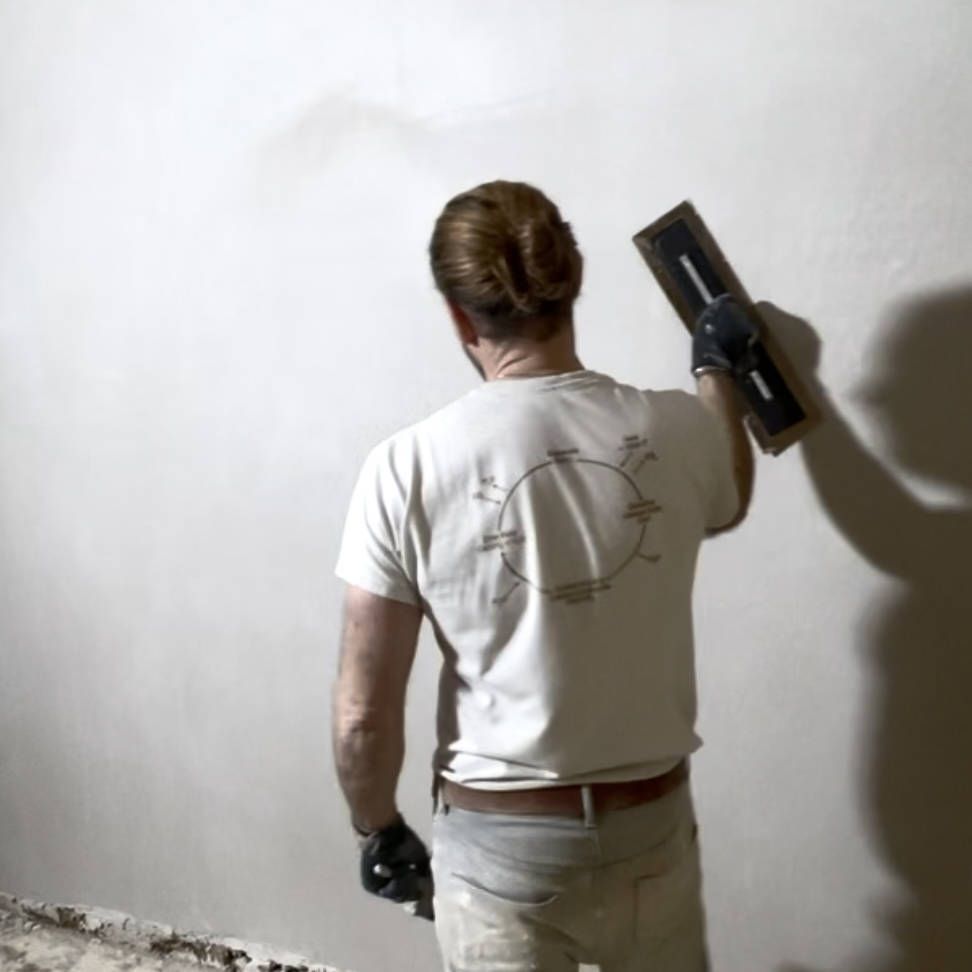
It contains a superfine aggregate and a higher proportion of lime putty, producing a smooth, buttery plaster that is applied much more thinly than the preceding coats and worked with a finishing trowel to achieve the required finish.
[View Top Coat Lime Plaster →]
What Can Lime Plaster Be Applied To?
The suitability of any background should be assessed before plastering begins.
Traditional lime plaster can be used over a variety of backgrounds when those backgrounds are correctly prepared.
These can include:
- Stone masonry
- Brick masonry
- Existing compatible lime backgrounds
- Timber laths
- Wood wool carrier boards
- Suitable breathable insulation systems
- Other compatible plaster carrier boards and backgrounds
Different backgrounds require different preparation.
A background being vapour permeable does not automatically mean that lime plaster will bond successfully to it, so the manufacturer’s requirements and the complete plaster system should always be considered.
Lime Plaster on Stone and Brick
Traditional masonry provides an excellent background for lime plaster when properly prepared.
The masonry should be sound and free from loose material, dust and coatings or contaminants that could prevent adhesion.
Existing incompatible or failing materials may need to be removed before plastering.
One of the most important considerations when applying lime plaster to masonry is suction.
Very dry or porous masonry can draw water rapidly from fresh plaster. If this happens too quickly, the plaster may not have sufficient moisture to work and cure properly.
Suction therefore needs to be assessed and controlled before plastering begins.
Lime Plaster on Timber Laths
Timber laths have been used as a plaster background for walls, ceilings and partitions for centuries.
The laths are fixed with small gaps between them. When the first plaster coat is applied, material is worked through these gaps and forms nibs behind the laths.
These nibs provide the mechanical fixing that holds the plaster to the lath work.
Riven timber laths are traditionally used, especially for ceilings because their irregular surface provides an excellent mechanical key for the plaster. They are also stronger as the timbers fibres have been naturally split with the grain rather than sawn.
Lime Plaster on Wood Wool Boards and Modern Breathable Backgrounds
Traditional lime plaster is not limited to historic masonry and timber laths.
Suitable wood wool carrier boards and compatible breathable insulation systems can provide useful backgrounds for lime plaster in both conservation and modern breathable construction.
However, the preparation and plaster specification may differ from traditional masonry.
Board manufacturer’s instructions, joint treatments, mechanical fixings, reinforcement requirements and any specified primers or bonding coats should be followed.
The compatibility of the whole system, rather than simply the plaster itself, is important.
Preparing a Background for Lime Plaster
Good preparation is fundamental to successful lime plastering.
Before plastering, the background should be assessed for:
- Stability
- Suction
- Surface texture and key
- Existing coatings
- Salts or contamination
- Excessive moisture
- Compatibility with lime
Loose material should be removed and defects addressed before plastering begins.
A good plaster system cannot compensate for an unstable or unsuitable background.
Controlling Suction
Controlling suction is one of the most important parts of traditional lime plastering.
Unlike most modern plastering, where suction is effectively eliminated with PVA and proprietary primers, traditional lime plastering requires a certain amount of suction to work successfully. The skill is learning how to control it.
If a dry background draws water from the plaster too quickly, working time can be reduced and curing compromised. At the other extreme, trying to finish a Top Coat on a wet, low-suction background can be virtually impossible.
When understood and controlled correctly, suction becomes an important part of the plastering process. It can help with rapid build-up of Base Coats, provide the right working conditions for floating and ruling, and make the difference between a beautifully finished Top Coat and a wet, bubbling nightmare.
How much water is required depends upon the background, temperature and site conditions. Some highly absorbent masonry may require repeated dampening, while other backgrounds require very little.
Understanding the background is more useful than following a fixed amount of water.
Applying Lime Plaster
The plaster is applied firmly to the prepared background and worked to achieve good contact.
Each coat should be appropriate to the background, required overall thickness and condition of the preceding coat.
The term ‘coats’ can actually be misunderstood as there are often multiple passes to each coat. A first pass creates the bond and controls the suction for another pass that can be ruled or trowelled. Very often the best way to control the suction of a substrate is with a coat of plaster.
Trying to achieve excessive thickness in a single application can create problems. Deep hollows and very irregular masonry may require dubbing out or additional work before the normal plaster coats are applied.
Traditional lime plastering is therefore better thought of as building a plaster system gradually rather than simply covering a wall.
Keying and scratching between coats
Each coat of plaster requires a mechanical key to bond it to the next in the form of a series of scratches. These keys/scratches differ depending on the following coat.
Coarse base coats require wide, rough scratches in a diamond or ‘cross hatch’ pattern, traditionally done with a wooden lath scratcher.
Smooth top coats require a finer, thiner scratch to bond to. This is traditionally done with a “devil float”, a flat wooden float with the tips of nails poking through the face. Used to compress, flatten and scratch in one process.
Protecting Fresh Lime Plaster
Fresh lime plaster should be protected from conditions that can cause excessively rapid drying, both internally and externally.
Depending upon the location and season, this can include protection from:
- Strong direct sunlight
- High temperatures
- Drying winds
- Frost
- Excessive artificial heat
Where necessary, gentle misting can help maintain appropriate moisture conditions during the early curing period.
The objective isn’t to keep the plaster permanently wet, but to prevent it losing moisture too quickly.
How Does Lime Plaster Dry and Cure?
One of the most common misunderstandings about lime plaster concerns drying.
Lime plaster doesn’t simply need to “dry out”. It needs to cure.
Non-hydraulic lime hardens primarily through carbonation, during which calcium hydroxide reacts with carbon dioxide from the air to form calcium carbonate.
For carbonation to take place effectively, the plaster needs appropriate conditions.
Allowing fresh lime plaster to dry extremely rapidly is therefore not desirable. Curing times are influenced by:
- Plaster thickness
- Background suction
- Temperature
- Humidity
- Ventilation
- Time of year
- Number of coats
- Moisture within the building
This is why fixed statements such as “leave lime plaster for exactly X days” can be misleading.
The condition of the plaster and the environment should be assessed before subsequent coats or decoration are applied.
Traditional lime plastering is a process where conditions matter.
Decorating Lime Plaster
One of the main reasons for choosing lime plaster is often to maintain a vapour-permeable wall build-up.
It therefore makes little sense to finish a carefully constructed breathable lime plaster system with an unnecessarily impermeable coating.
Traditional lime wash is by far the best option for vapour permeability, while a number of modern mineral paint systems are also available.
Determining when lime plaster is ready to paint is also a crucial factor. Traditional lime wash is essentially another coat of lime and can therefore be applied when the surface is hard enough to take a brush without damaging. The lime wash then carbonates and cures along with the plaster as one process and becomes part of the plaster itself rather than a surface coating.
Mineral paints on the other hand require the plaster to be fully carbonated before application can begin or it will inhibit the curing process of the lime. This can take a period of several months depending on the thickness of the plaster.
Whatever finish is selected should be compatible with lime and appropriate for the building.
Common Lime Plaster Mistakes
Allowing the Plaster to Dry Too Quickly
Strong heat, sunlight or draughts can remove moisture from fresh lime plaster too rapidly.
Control the environment rather than trying to force the plaster to dry.
Poor Suction Control
Applying lime plaster to very dry, absorbent masonry without controlling suction can cause the background to draw moisture rapidly from the plaster. On the other hand, hard impermeable or excessively damp surfaces with little to no suction can also create issues with bond, finishing and shrinkage.
Applying Too Much Material at Once
Lime plaster is traditionally built up in coats, and those coats applied in multiple passes. Trying to fill excessive depths in a single application can lead to problems.
Inadequate Key Between Coats
Each plaster coat needs an appropriate background to bond to. Correct preparation and keying between coats are important.
Using Incompatible Finishes
Low-permeability paints and coatings can undermine the reason for choosing a breathable lime plaster system in the first place.
Treating Every Old Building the Same
Historic buildings vary enormously.
Stone type, masonry condition, previous repairs, moisture, exposure and existing materials should all influence how the work is approached.
Frequently Asked Questions
Is lime plaster better than gypsum plaster?
Neither material is universally better.
They have different properties and uses. Lime plaster is particularly appropriate for many traditional solid-wall buildings because of its vapour permeability, flexibility and compatibility with historic construction.
Gypsum plaster is a relatively moisture-sensitive material and can be problematic when used directly over traditional masonry where persistent moisture or salts are present. It remains entirely appropriate in many other situations.
The important thing is choosing a material suited to the building.
Is lime plaster breathable?
Traditional lime putty plaster is highly vapour permeable.
“Breathable” is a convenient shorthand, although walls do not literally breathe. What matters is the ability of the materials within the wall build-up to allow moisture and water vapour to move appropriately.
Can you lime plaster directly onto stone?
Yes, suitable stone masonry can provide a good background for traditional lime plaster.
The wall must first be assessed and appropriately prepared, with particular attention paid to stability, cleanliness, surface key and suction.
Can lime plaster be used over brick?
Yes. Suitable brick masonry can be lime plastered when correctly prepared.
Can lime plaster be applied to plasterboard?
Standard plasterboard is not the same as a traditional masonry or lath background, but with the right preparation lime plaster can be used successfully on it.
Can you lime plaster over wood wool board?
Suitable wood wool carrier boards are commonly used as backgrounds within compatible lime plaster systems.
The board, fixings, joint treatment, reinforcement and plaster specification should form part of a compatible system.
How many coats of lime plaster are required?
Traditional plastering commonly uses a three-coat system consisting of Base Coat, Float Coat and Top Coat.
However, the actual build-up required depends upon the background, existing construction and nature of the work.
Does lime plaster need to be kept damp?
Fresh lime plaster may need protection from rapid moisture loss during early curing.
Depending upon conditions, this can include careful misting and protection from direct sun, heat and drying winds.
This doesn’t mean continuously soaking the plaster.
Can I paint lime plaster?
Yes, once appropriately cured and dry.
Choose a finish compatible with lime and the required vapour permeability of the wall system, such as traditional lime wash or a suitable modern breathable paint.
Choosing Your Lime Plaster
For a traditional three-coat lime plaster system:
Base Coat
The coarse first coat for suitably prepared masonry, timber laths and compatible backgrounds.
[Shop Base Coat Lime Plaster →]
Float Coat
The second coat used to build, straighten and level the plaster surface.
[Shop Float Coat Lime Plaster →]
Top Coat
The fine finishing plaster forming the final surface.
[Shop Top Coat Lime Plaster →]
Traditional Materials. Practical Experience.
Understanding lime plaster is as much about understanding the building as understanding the material.
Background, suction, moisture, temperature, thickness and curing conditions all influence the finished work. This is why traditional plastering has always relied upon judgement and experience rather than a single set of instructions that applies to every building.
The Natural Plaster Company’s lime plaster range is informed by 30 years of practical experience working with traditional materials and historic buildings.
Alongside our lime plasters, we supply specialist plastering tools, timber laths and technical information for traditional and conservation plasterwork.
